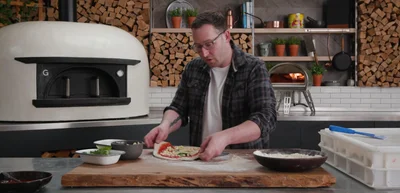
The quest for the perfect pizza is a culinary pilgrimage, one often fraught with soggy bottoms and uneven browning. But what if we told you the key to unlocking pizza nirvana lay not in expensive ovens or exotic ingredients, but in a simple, yet profoundly effective technique: the Gosney Turning Peel. This seemingly humble tool, when mastered, transforms the pizza-making experience, allowing for unparalleled control and consistent results. Forget battling a stubborn dough that refuses to release from your baking sheet; with the Gosney Turning Peel, you'll achieve a crisp, perfectly charred crust every single time.
Imagine launching your pizza into the fiery heart of your oven with effortless grace, rotating it with precision to ensure even cooking. This isn't just about creating a visually stunning pie; it's about unlocking the full potential of your dough and your ingredients. In the following sections, we'll guide you through a step-by-step process to mastering the Gosney Turning Peel, transforming you from a pizza enthusiast into a true artisan.
Preparation and Safety Guidelines
- Gosney Turning Peel
- Pizza Oven
- The Gosney turning peel is made of wood and therefore susceptible to burning. Always ensure it's properly seasoned and avoid prolonged exposure to intense heat. If it starts to smoke heavily, remove it immediately.
- Hot ovens and sharp peels are a dangerous combination. Use oven mitts or gloves at all times when handling the peel and oven door. Be cautious of steam when inserting and removing the pizza.
- The peel's surface can become very hot, especially after use. Allow it to cool completely before cleaning or storing. Never leave it where children or pets could reach it.
Step-by-Step Instructions
Preparing the Pizza
- Slide the pizza onto the peel.
- Give the pizza a secondary stretch to reach the edges.
- Heat the peel to ensure it's dry and slides easily.


Preparing the Pizza Initial Oven Placement
- Slide the pizza onto the hot surface of the oven, using the back of the oven as a support until it catches.

Initial Oven Placement Initial Baking and Crust Development
- Wait 20-30 seconds for the crust to rise and bubble.
First Rotation and Base Checking
- Give the pizza one rotation using the turning peel, ensuring even cooking.
- Continuously check the base for even coloring.


First Rotation and Base Checking Turning and Rotating with the Peel
- Use the turning peel to get under the base, gently pulling and pushing to rotate.
- Use the front of the oven as a pivot point for the turning peel.
- For the first turn, break the seal all around and lift the pizza, using an edge to touch the oven stone and create adhesion.
- Use the front of the oven as a pivot point, pulling and pushing the peel to rotate the pizza.


Turning and Rotating with the Peel Final Baking and Topping
- Dome the pizza (bring it up towards the flame) for even baking and coloring.
- If the base cooks faster than the toppings, move the pizza to the mouth of the oven to finish cooking the toppings without burning the base.


Final Baking and Topping
Read more: Making Pizza with a Large Pizza Peel
Tips
- Practice the turning motion on a flat surface before using the oven.
- Use a hot, dry peel for easier sliding.


