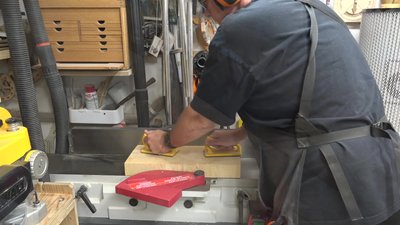
Forget flimsy store-bought pizza peels that bend under the weight of your culinary masterpiece! Crafting your own pizza peel offers a rewarding experience, resulting in a durable, personalized tool perfectly suited to your oven and pizza-making style. This guide champions a time-honored method: hand-planing. While it demands a bit more elbow grease than other approaches, the satisfying process of transforming raw wood into a functional, beautiful pizza peel is unmatched. The tactile feel of the smoothly planed wood, the precise control you gain over the final product, and the undeniable pride in your handiwork are all significant benefits.
Hand-planing allows for exquisite control over the final surface, leading to a peel that glides effortlessly under your pizza. This article provides a comprehensive, step-by-step guide to creating your own DIY pizza peel using the hand-planing method, walking you through selecting the right wood, preparing the surface, and achieving that perfect, smooth finish. Let's get started!
Preparation and Safety Guidelines
- Rough-cut lumber (Walnut and Maple)
- Jointer planer
- Bandsaw
- Thickness planer
- Table saw
- Glue (Type III)
- Dowels
- Clamps
- Scrapers
- Belt sander
- Oscillating drum sander
- Block plane
- Larger plane
- Beam compass
- Drill
- Cutting board oil and wax (optional)
- Always use sharp hand planes. Dull tools require more force, increasing the risk of slips and injuries.
- Wear safety glasses to protect your eyes from wood chips and splinters.
- Work in a well-ventilated area. Wood dust can be irritating and harmful if inhaled.
Step-by-Step Instructions
Prepare the Wood
- Flatten one side of the rough-cut lumber using a jointer planer. Re-saw the lumber using a bandsaw and mill it to a 5/8 inch thickness.
- Mill the stock to the final width (13 inches). The lengths will vary depending on design.


Prepare the Wood Laminate the Wood
- Joint all edges of the Maple and Walnut pieces to ensure a flush fit. Glue and clamp the pieces together using dowel joinery for alignment and added strength. Use Type III waterproof glue.

Laminate the Wood Glue Drying and Cleanup
- Let the glue dry overnight. Remove excess glue.

Glue Drying and Cleanup Plane to Final Thickness
- Use the thickness planer to reduce the laminated wood to 1/2 inch thickness, making multiple passes to avoid damaging dowels.

Plane to Final Thickness Square the End
- Trim the end of the board with a table saw to ensure a perfectly square end.

Square the End Layout and Marking
- Mark the dimensions for the pizza peel (14 inches long, 13 inches wide, handle included). Use a beam compass to create the curved shapes for the handle and the end of the peel.

Layout and Marking Rough Cut the Shape
- Cut out the pizza peel shape on the bandsaw, slightly outside the marked lines, leaving room for sanding.

Rough Cut the Shape Sand the Perimeter
- Sand the perimeter using a belt sander and oscillating drum sander to achieve a smooth, precise finish.

Sand the Perimeter Taper the Edges
- Draw lines 1 inch and 7/32 inch from the edges to guide the planing process. Use a larger smoothing plane to remove most of the material and a block plane for detailed shaping and creating the tapers along the edges.

Taper the Edges Drill Hanging Hole
- Drill a hole for hanging.

Drill Hanging Hole Final Sanding
- Sand the entire pizza peel to smooth out sharp edges and corners. Break sharp corners on the handle for comfort.

Final Sanding Apply Finish
- Apply a food-safe cutting board finish (mineral oil and paraffin wax mixture), or mineral oil alone.
Read more: Making Pizza with a Large Pizza Peel
Tips
- Use Type III waterproof glue for strength and water resistance.
- Take multiple passes with the thickness planer to avoid damaging the dowels.
- Trust your instincts when choosing tools and methods. Hand planing provided the best results in this project for edge tapering, despite being more time-consuming.


